Service Host: SysMain High Memory - How To Manage It
![]() 6 min. read
6 min. read
![]() Published on
Published on
Share this article

Improve this guide
Read our disclosure page to find out how can you help Windows Report sustain the editorial team Read more
Is the Service Host: SysMain high memory issue slowing down your Windows PC?
Your PC runs hundreds of services in the background to keep the whole system up and running. One of them is the SysMain or Superfetch process. If you’ve noticed that it consumes an unusually high amount of memory, read on as I show you how to lower it.
What Is the Service Host: SysMain Process?
Service Host: SysMain or Service Host: Superfetch is a signed and certified Windows OS tool. With the release of the Windows 10 version 1809 update, Microsoft has replaced Superfetch with SysMain. That’s because many users started disabling the Superfetch service manually. So, by changing its name to SysMain, Microsoft hoped that users wouldn’t know that Superfetch still exists.
This process learns from your regular interaction with the PC. After accumulating enough data, it predicts which apps you might be using. Then, it pre-loads those apps, so executing the app icon on the Desktop opens quickly without loading much data.
However, many Windows 10 and 11 users have reported that the service utilizes extensive RAM, CPU, SSD, and other resources, ultimately slowing down the whole PC.
How To Fix Service Host: SysMain High Memory
Try these troubleshooting methods in the order they appear. I’ve organized them so you can start with the easiest ones and keep advancing to more complex methods.
Stop the Service Host: SysMain Temporarily
If the issue appears only sporadically, you can simply end the process to prevent overuse of PC memory and CPU.
Here’s how:
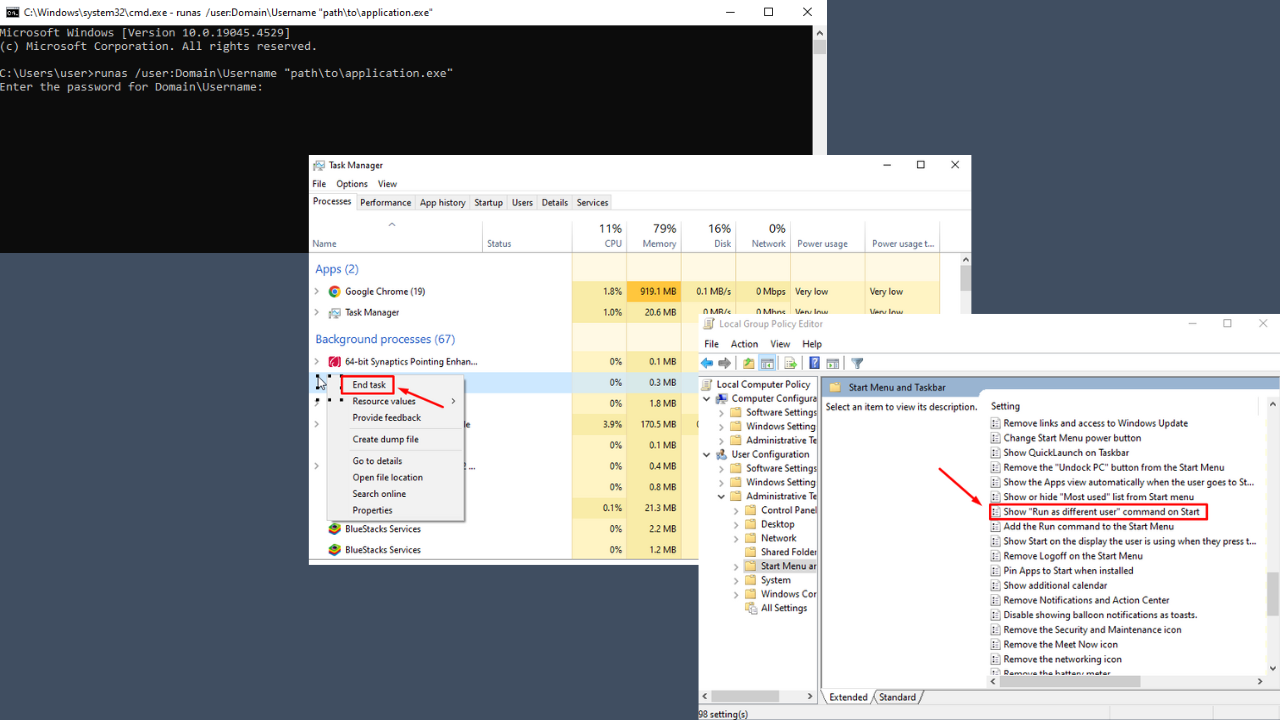
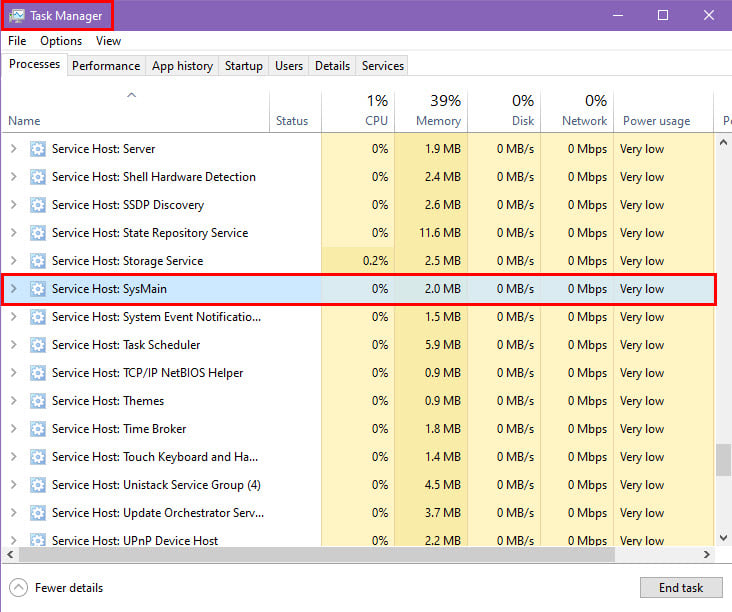
- Press Ctrl + Shift + Esc to launch the Task Manager.
- Click on the Memory column header to sort all processes by memory usage.
- If the SysMain process utilizes the most RAM, it’ll be at the top.
- Alternatively, you can scroll down to the Windows processes section and look up the Service Host: SysMain process.
- Right-click on it and select End task from the context menu.
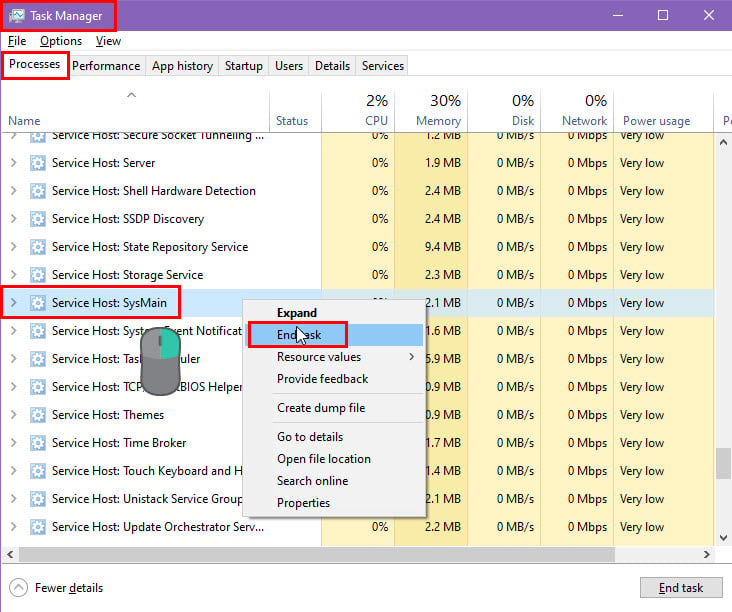
- It should stop instantly.
- On certain devices or user accounts, you might get the following additional confirmation box:
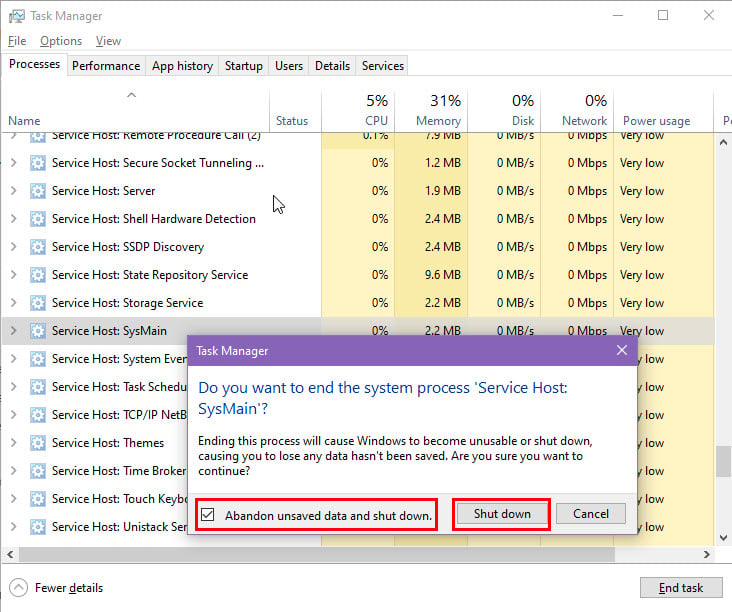
- Checkmark the checkbox for Abandon unsaved data… and hit the Shut down button.
- The PC will shut down.
- Turn it on and the SysMain process shouldn’t bother you this time.
Disable the Service Host: SysMain Process
You can permanently disable this process by following any of these methods:
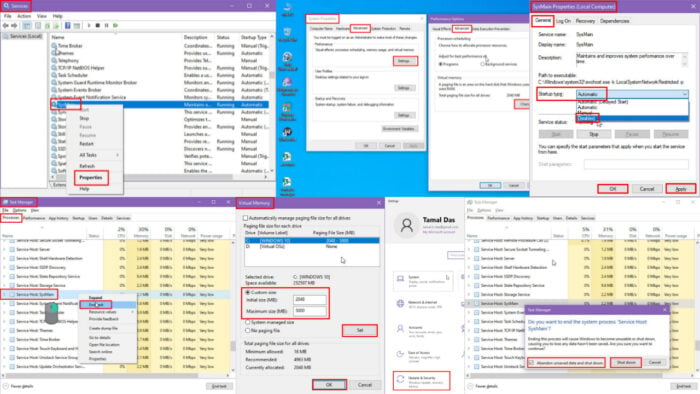
Disable SysMain from Services
- Click on the Start Menu icon and type Services.
- Under the Best match result, click on the Services System tool.
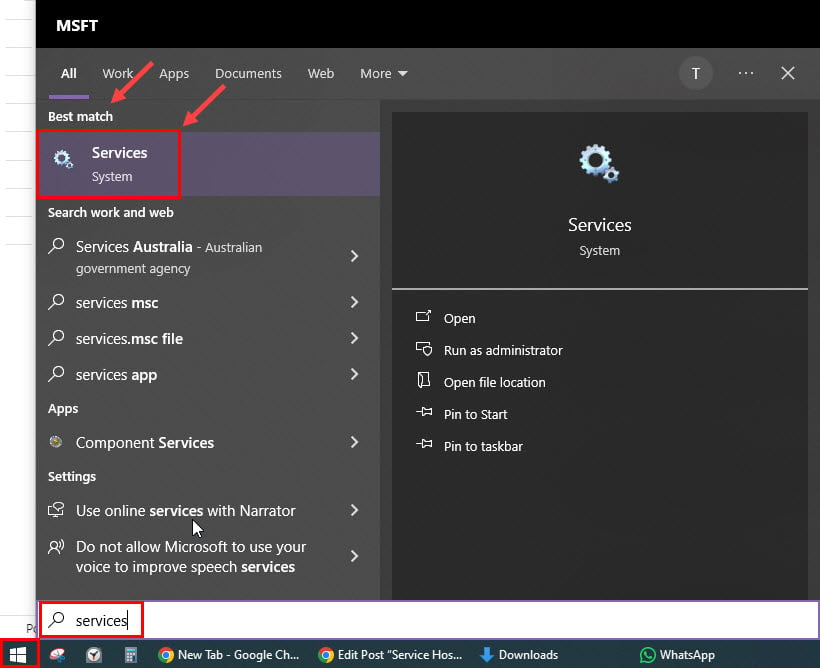
- The Windows Services app will open.
- Find the SysMain service in the list of items.
- Right-click on it and select Properties from the context menu.
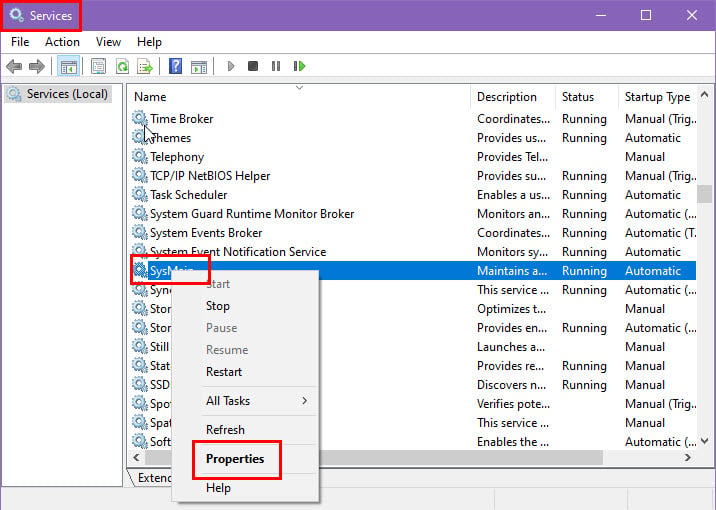
- You should see the SysMain Properties (Local Computer) dialog.
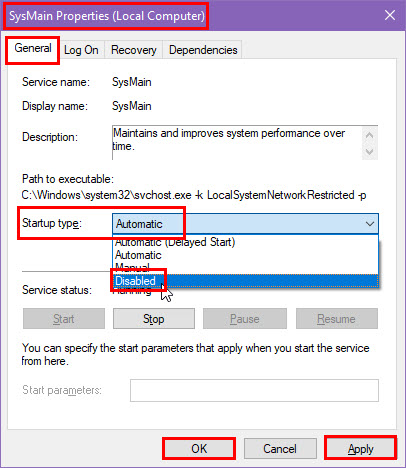
- Under the General tab, click on the Startup type drop-down list and choose Disable.
- Click Apply and select OK to save the changes.
Disable SysMain Using Command Prompt
If you’re unable to try the previous method, check out this alternative below:
- Open Windows Command Prompt with administrative privilege from the Start Menu.

- In the Command Prompt window, enter the following code and press Enter:
sc stop "SysMain" & sc config "SysMain" start=disabled- Look for the following message in the Windows terminal window:
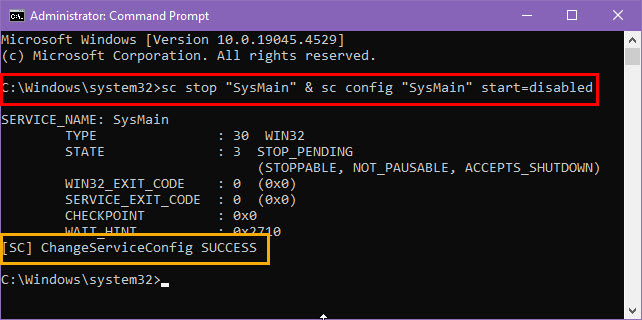
- The above message confirms that Windows has successfully disabled SysMain.
Increase Virtual Memory or Page File
If you don’t want to disable SysMain completely, you can take the following steps to increase the virtual memory by allocating a portion of your HDD, SSD, or M.2 NVMe SSD.
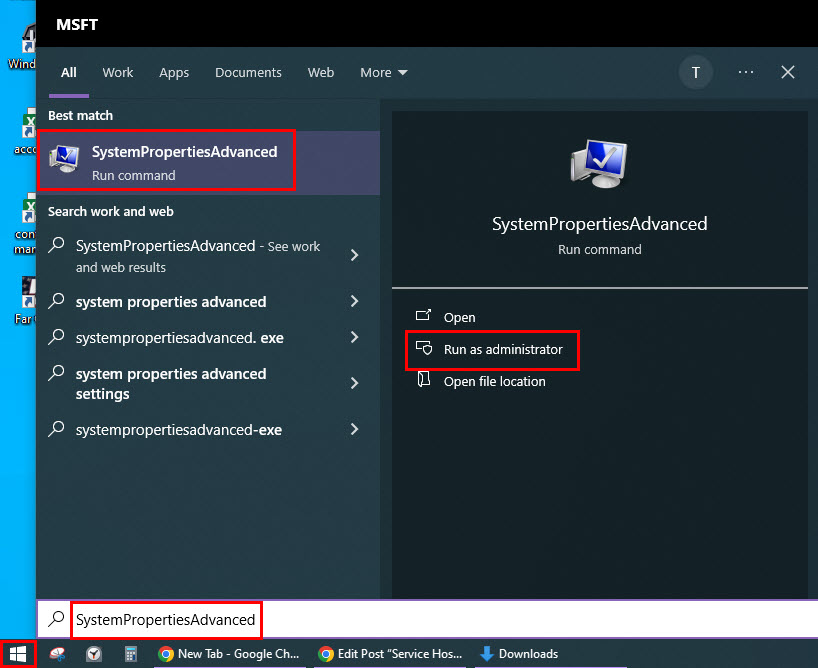
- Press the Windows key and type SystemPropertiesAdvanced. Click Run as administrator in the search results.
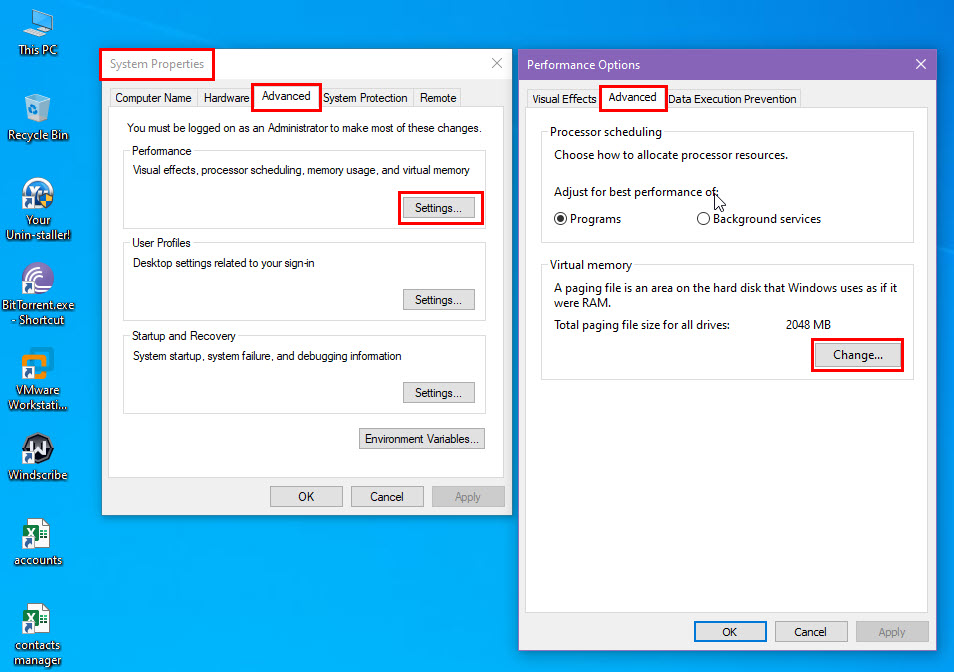
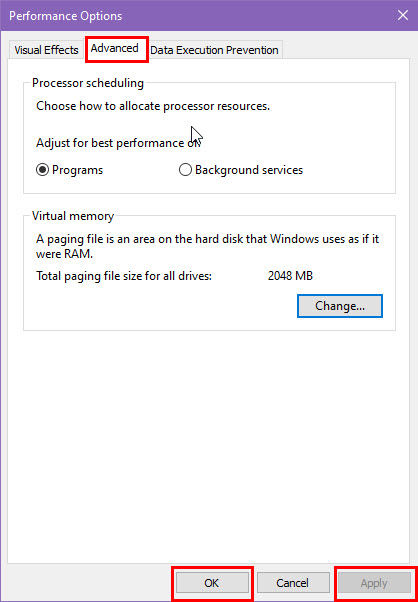
- In the System Properties window, click the Advanced tab and then the Settings button under Performance.
- In the Performance Options window, select the Advanced tab and click Change under Virtual memory.
- Uncheck Automatically manage paging file size for all drives if it’s selected. Then, select Custom size.
- Enter the desired initial and maximum size for the paging file (in megabytes) and click Set.
- You should aim for 2,048 MB Initial size and 10,240 MB Maximum size.
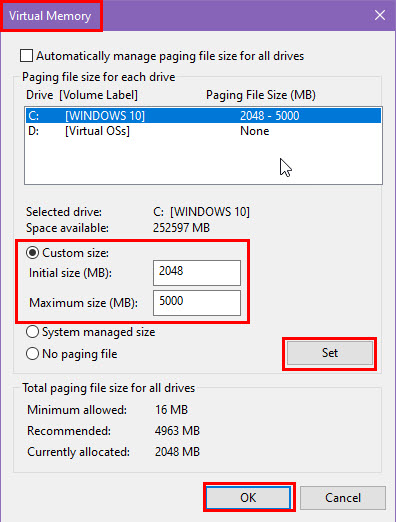
- Click OK and select Apply to save the changes.
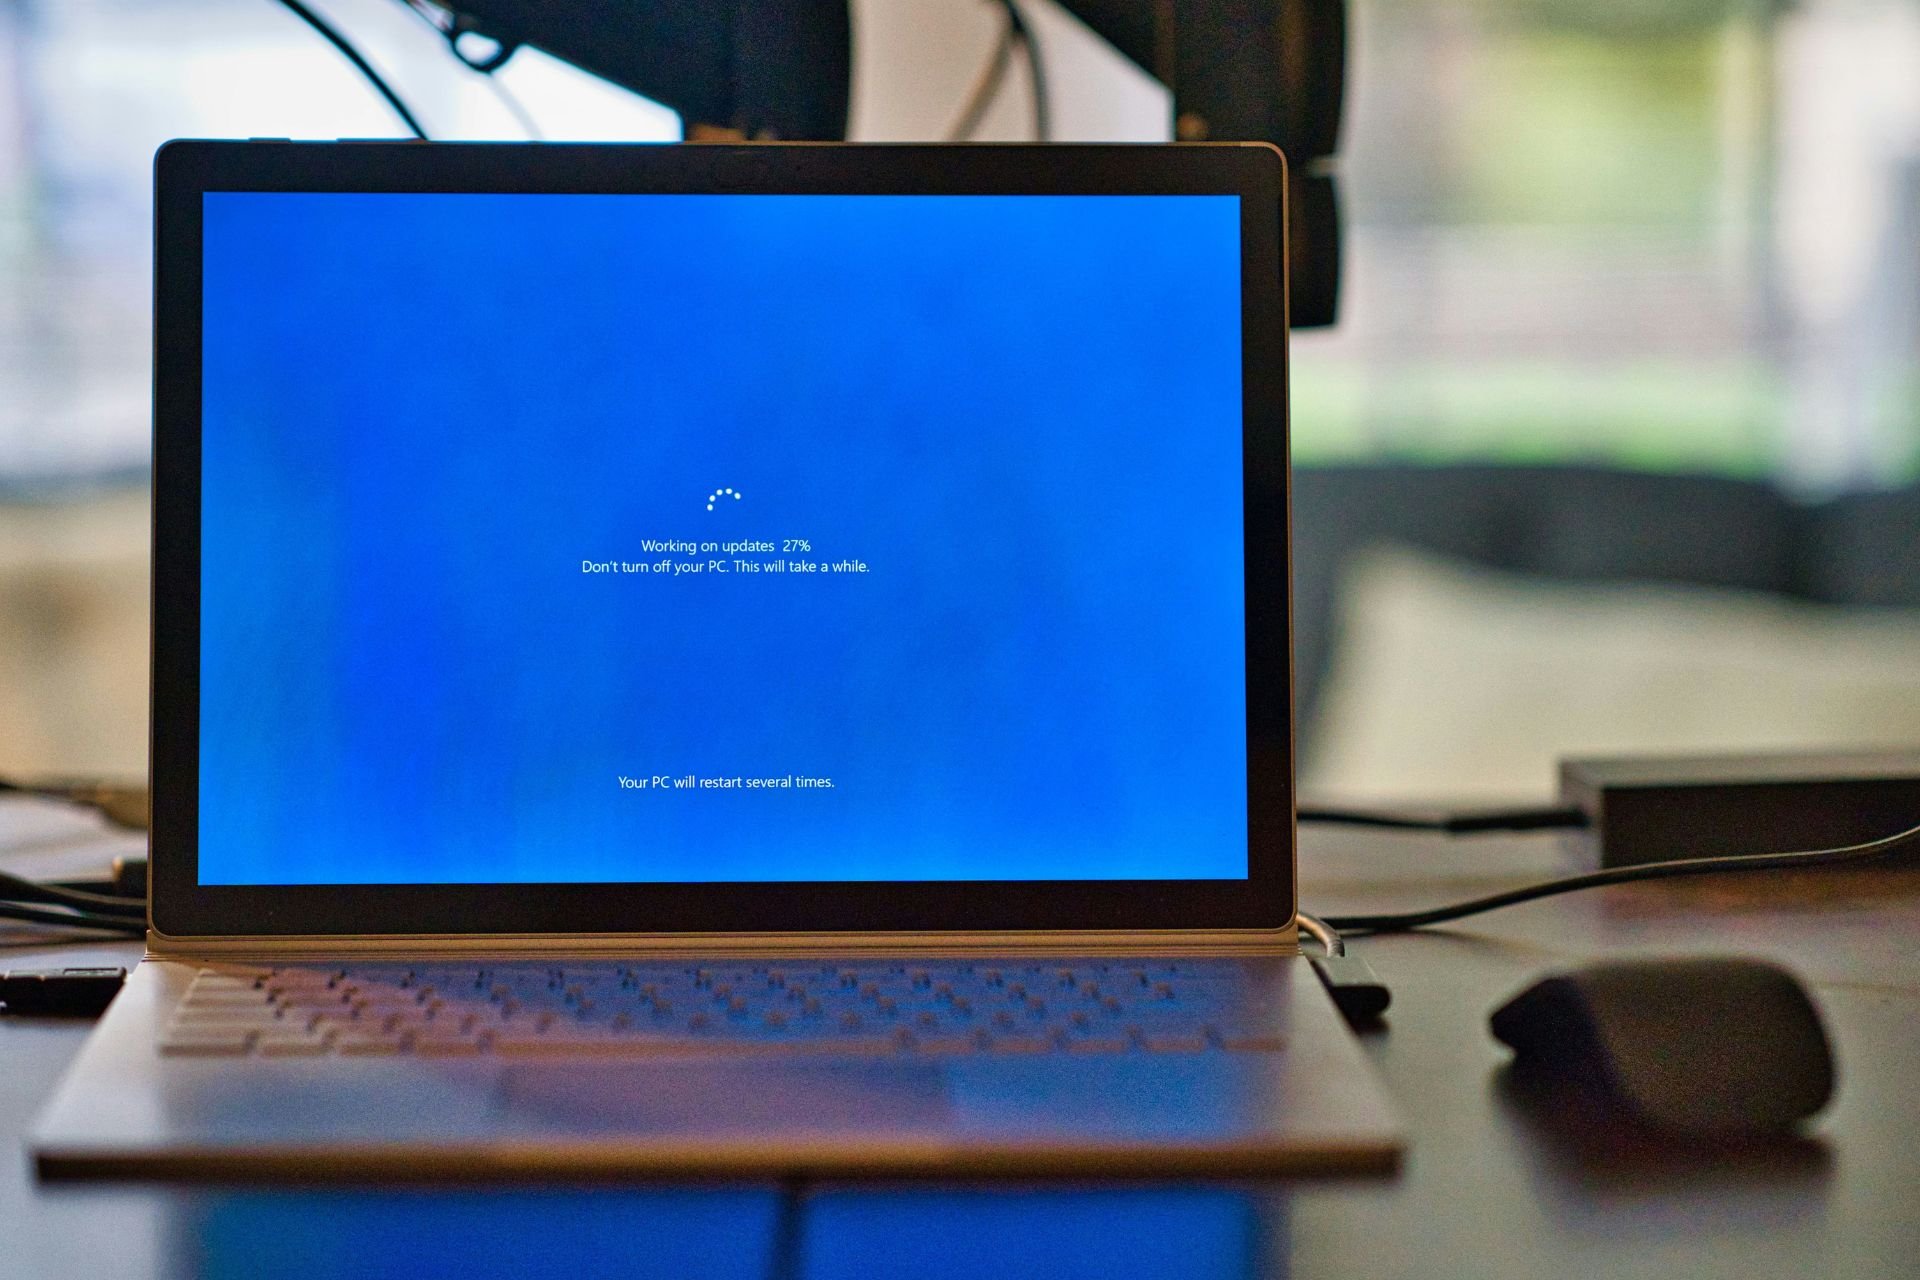
- Restart your computer for the new paging file size to take effect.
Scan for Malware and Viruses
Sometimes, a malicious program might keep SysMain busy and force it to eat up your PC’s memory. Use the Windows Security tool to detect and remove such programs with these steps:
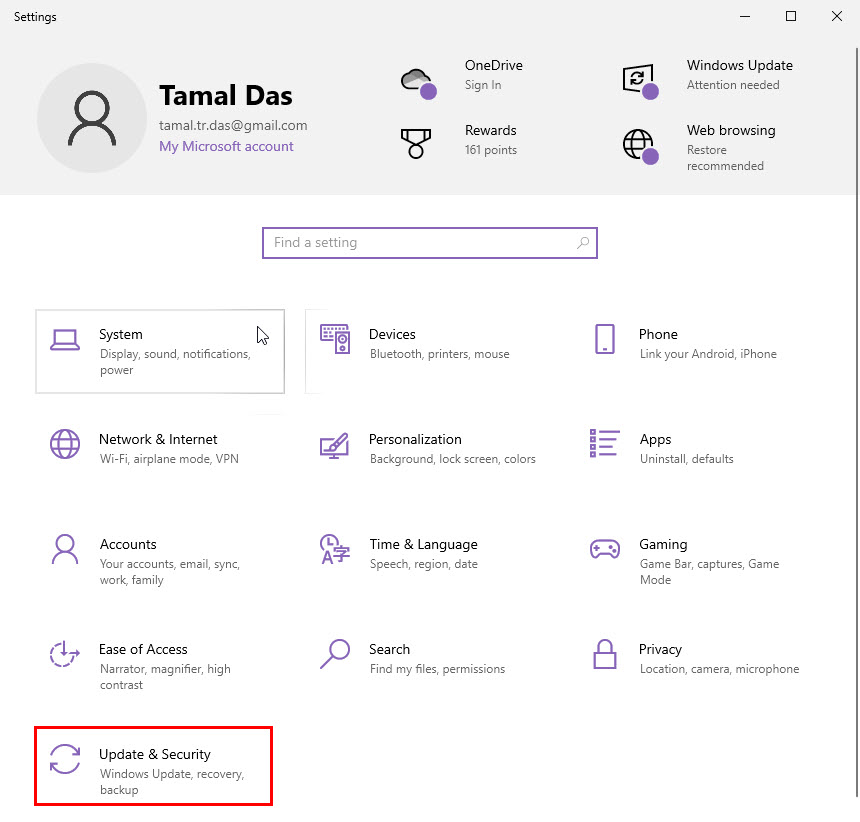
- Press Windows + I to bring up the Settings app.
- Click on Update & Security.
- Select Windows Security on the next screen.
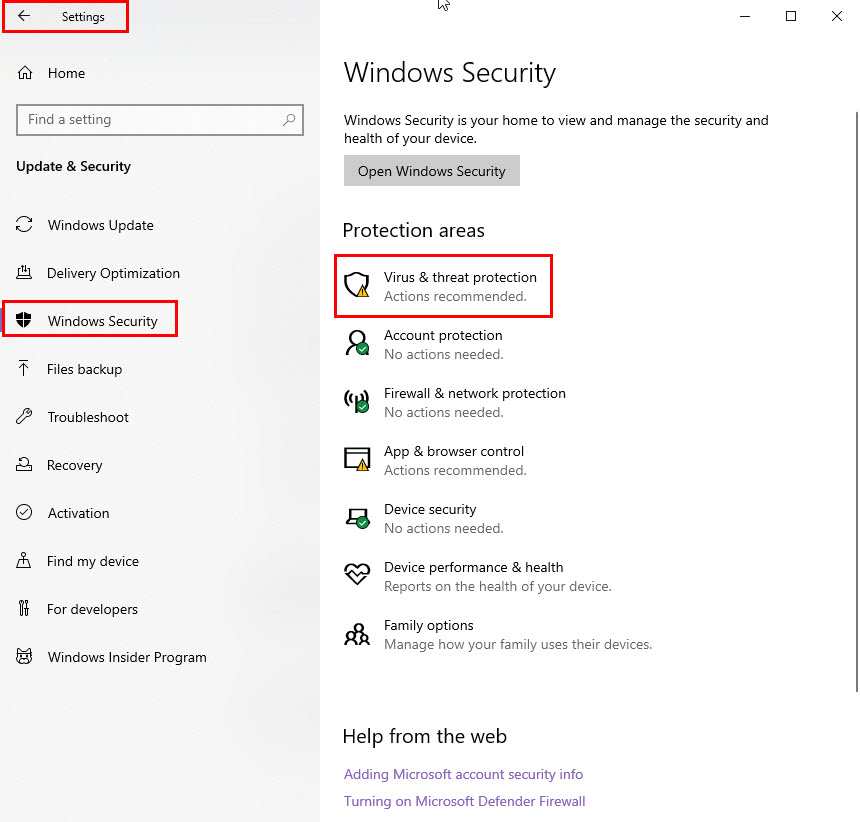
- Now, click on Virus & threat protection on the right side.
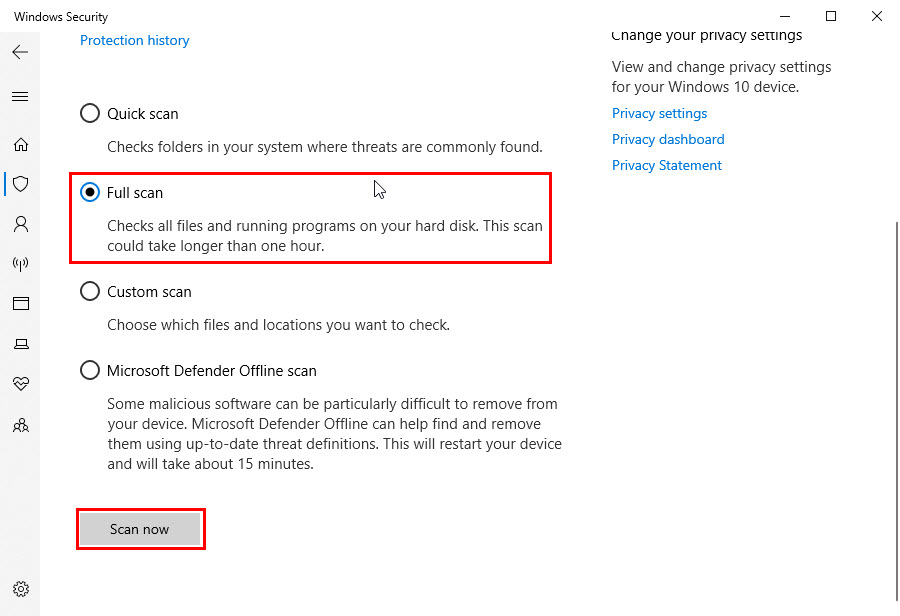
- Choose Scan options and select the Full scan selection.
- Select Scan now.
Update Windows OS
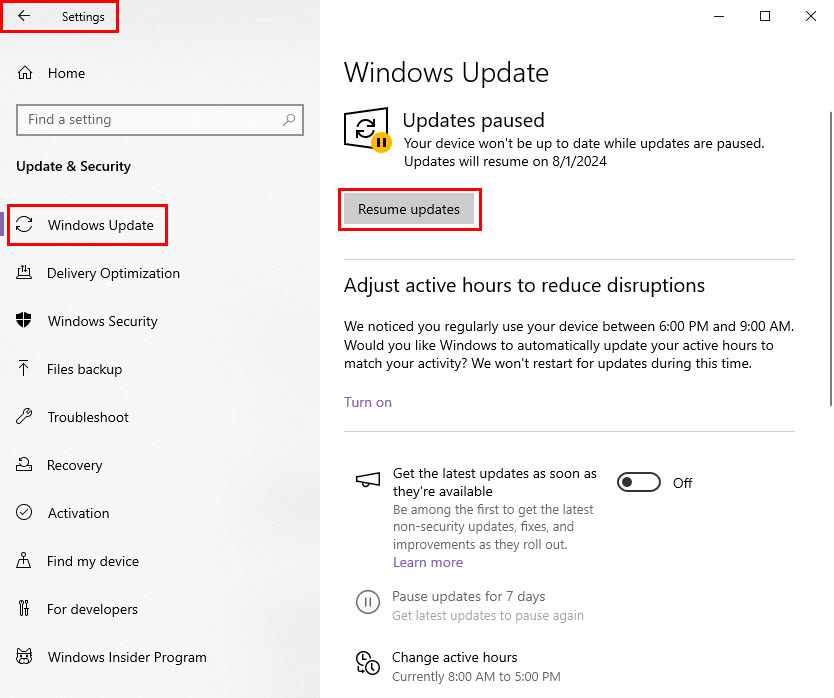
- Go to the Windows Update & Security menu from the Settings app.
- Select the Windows Update option on the left side navigation panel.
- On the right side, click on Check for updates, Resume updates, or Download & install.
Identify and Remove Conflicting Programs
- Press the Windows key + R to open the Run dialog.
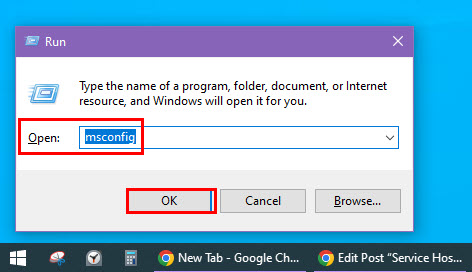
- Type msconfig and press Enter to open the System Configuration window.
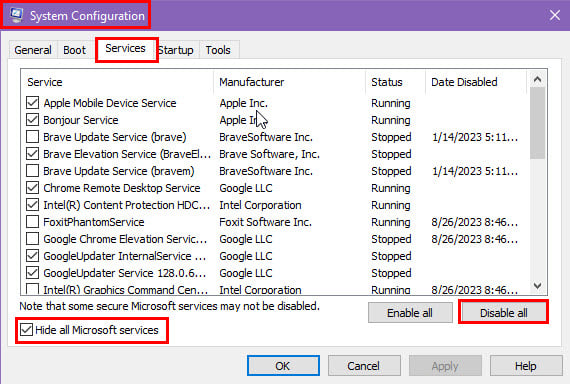
- Click on the Services tab.
- Select the Hide all Microsoft services checkbox.
- Click Disable all.
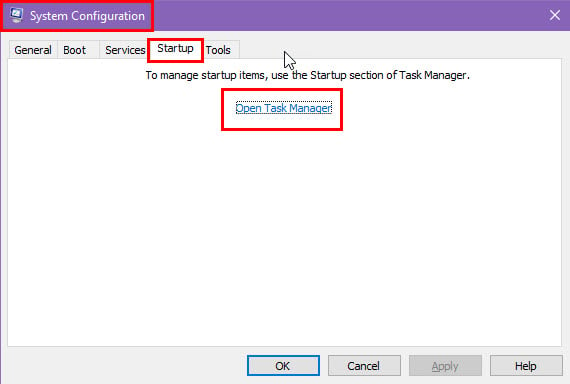
- Click on the Startup tab.
- Select the Open Task Manager option.
- In Task Manager, right-click on each startup program you want to disable and select Disable.

- Close Task Manager and click OK in the System Configuration window.

- Reboot your Windows PC.
If the SysMain service doesn’t occupy much memory after performing the above steps, the issue is linked to recently installed software.
Here’s how to locate the latest apps on your PC for uninstallation purposes:
- Go to the Apps menu from the Windows Settings app.
- Below the Apps & features section, click on the Sort by: Name drop-down menu.
- Choose the Install Date option.
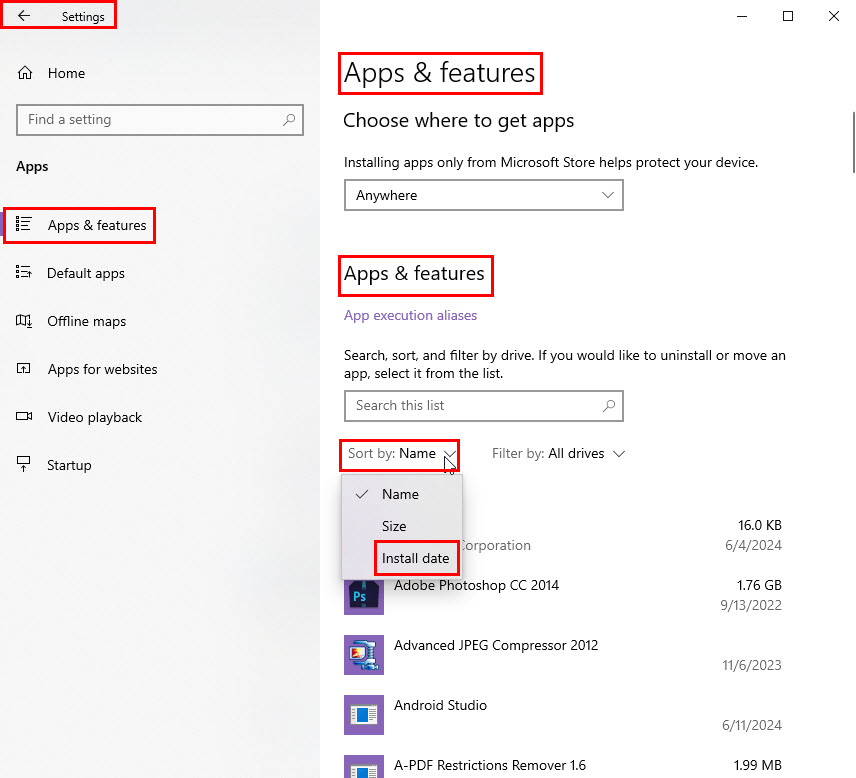
- Windows will show all the recently installed apps on the top.
- Remove the app that you’ve added recently.
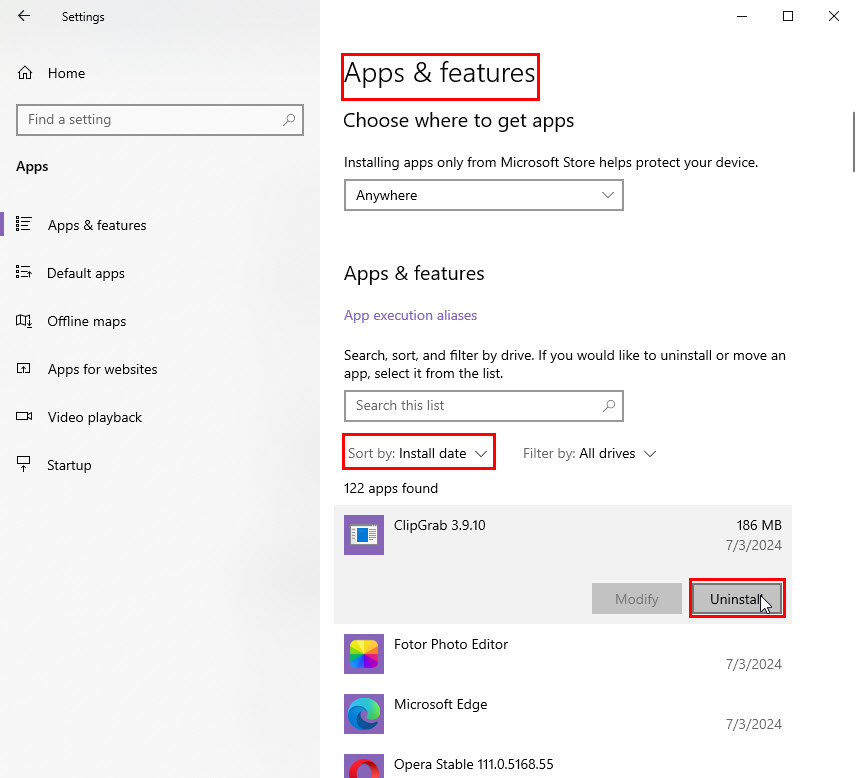
- Now, check if the issue is fixed.
So, these are the tried and tested methods to deal with the Service Host: SysMain high memory problem.
If the article helped you speed up your PC or you wish to share critical feedback, feel free to comment below! Moreover, if you’re experiencing something similar with Bdservicehost or you want to reduce the service’s disk usage, we’ve got you covered.