Audacity is Not Recording Sound: 7 Tested Solutions to Fix it
Make sure that your microphone is connected correctly to your PC
5 min. read
Published on
Read our disclosure page to find out how can you help Windows Report sustain the editorial team Read more
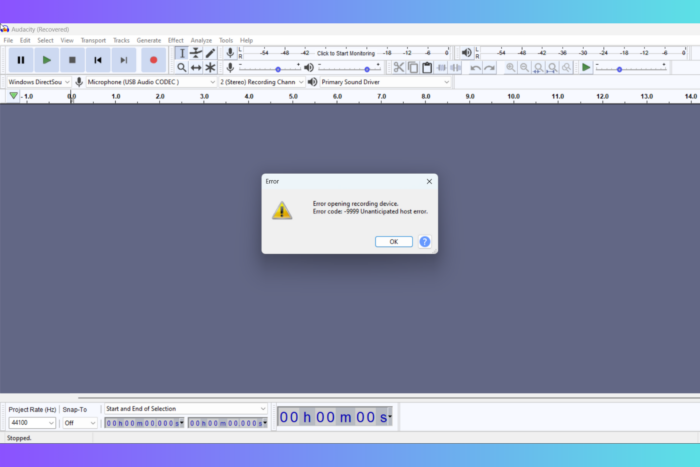
If Audacity is not recording the sound from your microphone, that’s usually because of incorrect software or Windows settings for audio. Sometimes you may also see the Error opening recording device error message, which typically shows an improper input or enabled sound device.
Other reasons may include incorrect MME settings, improper sample rate, an outdated app or plugins interfering with your recording. However, before anything else, make sure that the mic is correctly connected to the right port in your PC and it’s detected by Windows.
What can I do if Audacity is not recording sound?
1. Make sure you’ve selected the right input
- Open your Audacity recording project.
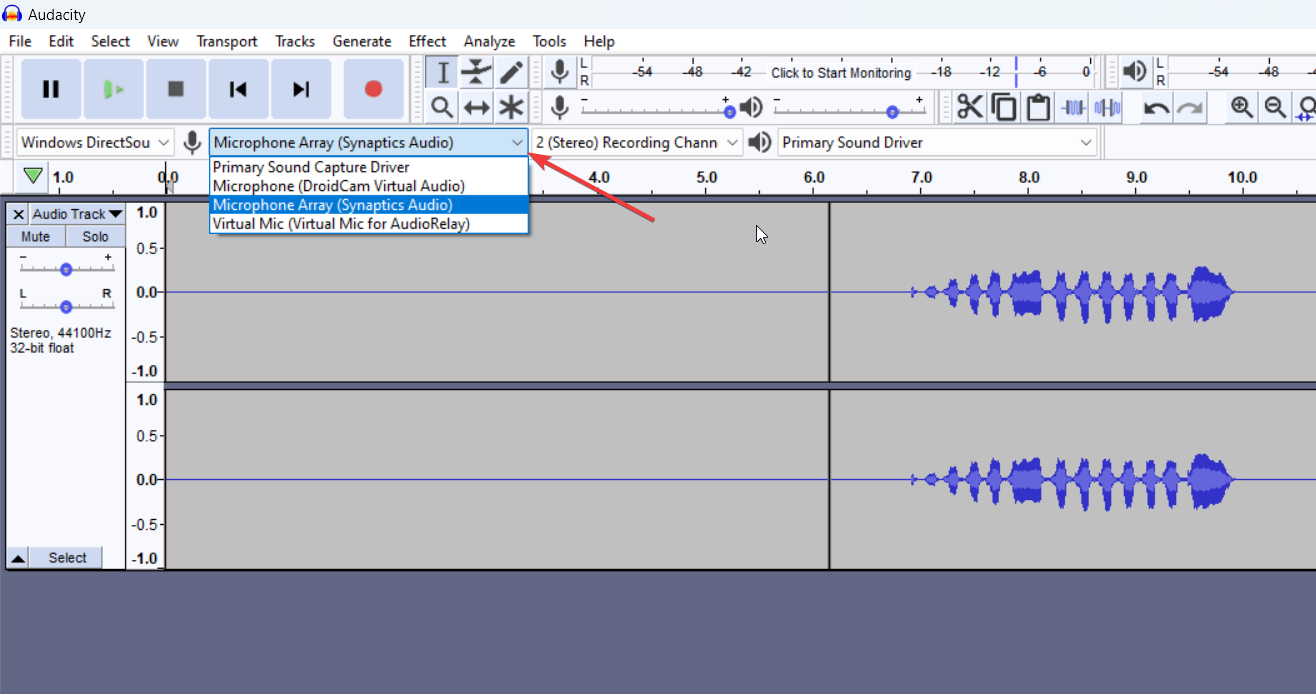
- Select the right device for recording from the second drop down menu under the microphone section.
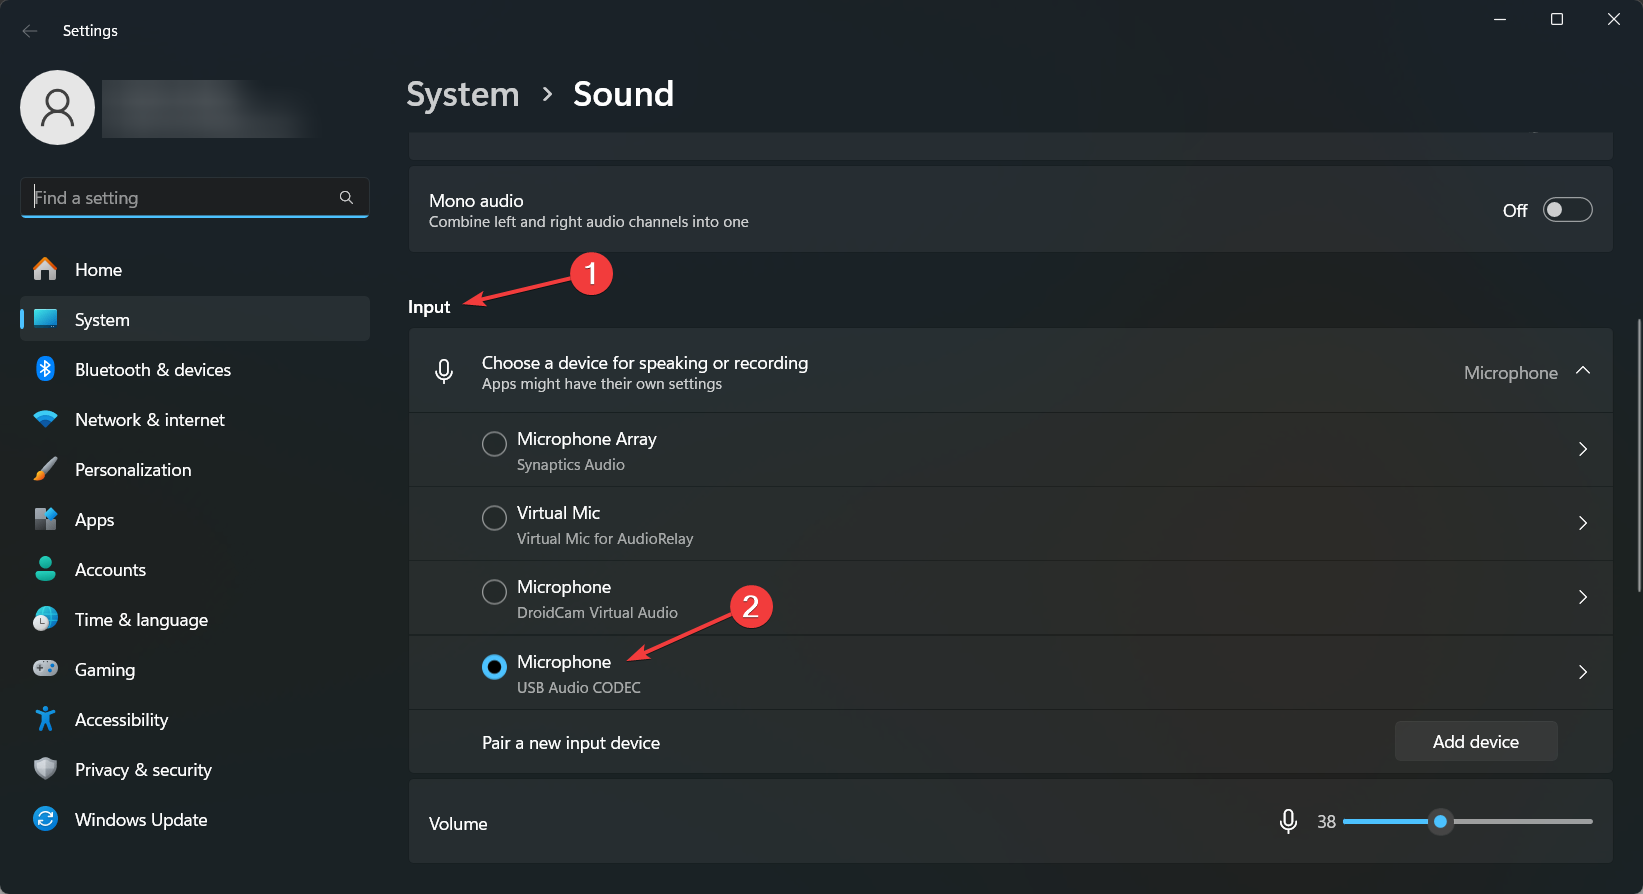
- If the device is not on the list, right click the Volume icon on the taskbar and select Sound settings.
- Make sure that the external microphone is plugged in and select it within the Input section from the list. Also, make sure to turn the mic volume up from below.
- Now, see if you can find the device in the Audacity input list. If not, restart the app.
- Finally, hit the Record button in Audacity and see if the app is picking up any signal.
I common problem when I start a recording session is that I don’t plug in my mic before starting Audacity. Even if I notice and plug it in, the app doesn’t add it directly so I must restart the app to see it in the recording menu. We also have a guide on how to test your microphone on Windows 11 that might come in handy.
2. Set the correct recording settings in Audacity
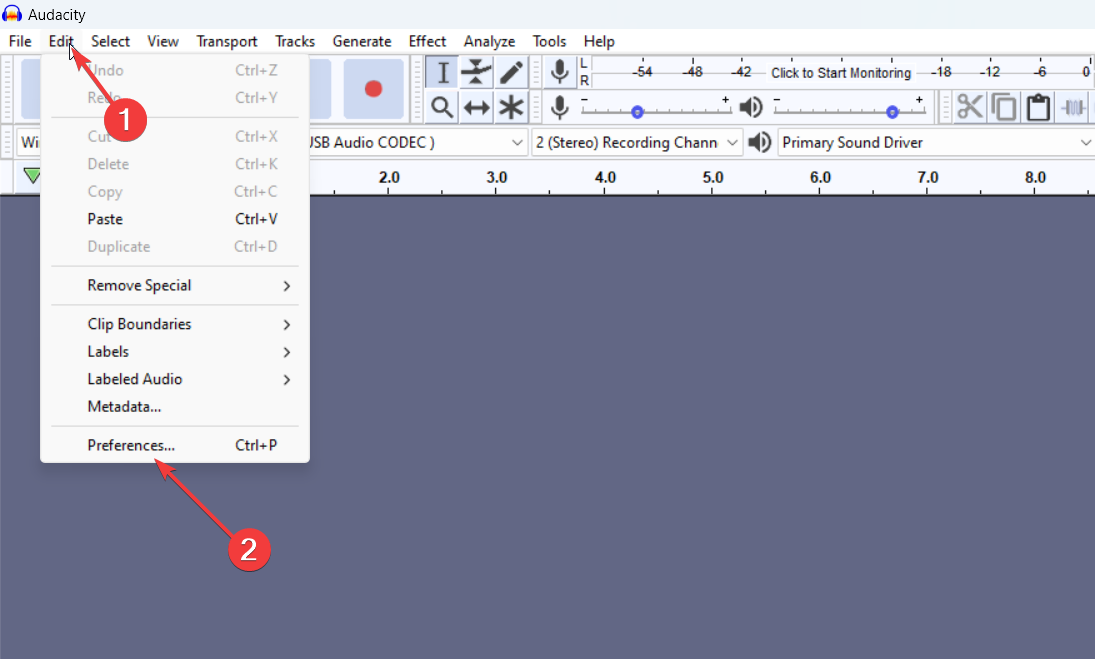
- In Audacity, click on Edit and select Preferences.
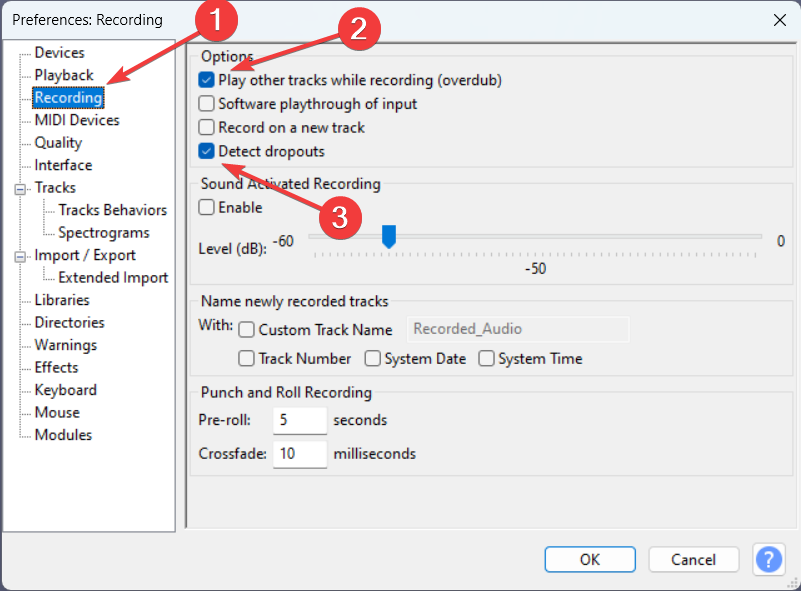
- Go to the Recording tab, and make sure you check the Play other tracks while recording and Detect dropouts options.
- Make sure that nothing else is checked and don’t change the default values for the Punch and Roll Recording default settings.
Audacity’s default settings include the recommended checked options above, but if you’ve changed them by mistake, you may have problems recording.
3. Adjust the sample rate of the track and mic
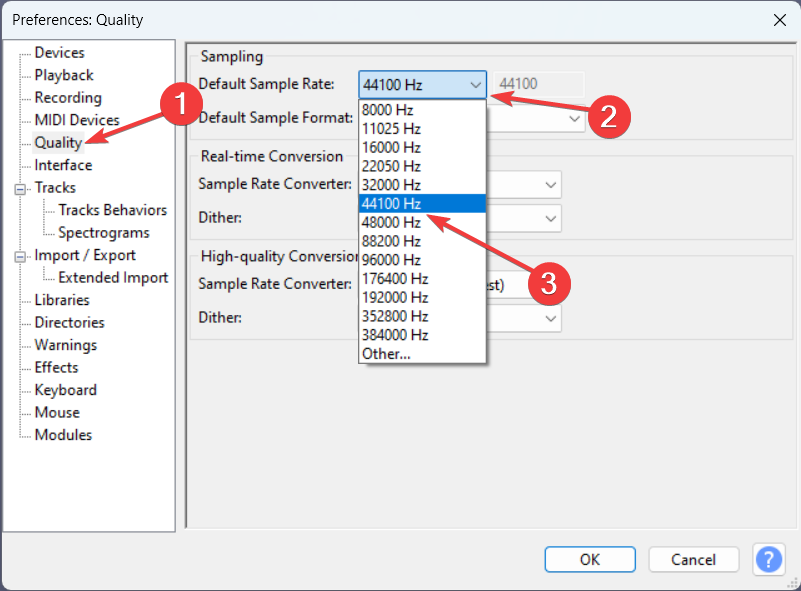
- In Audacity, go to Edit > Preferences.
- This time, select the Quality tab.
- Here, check the Default sample rate to 44100 Hz.
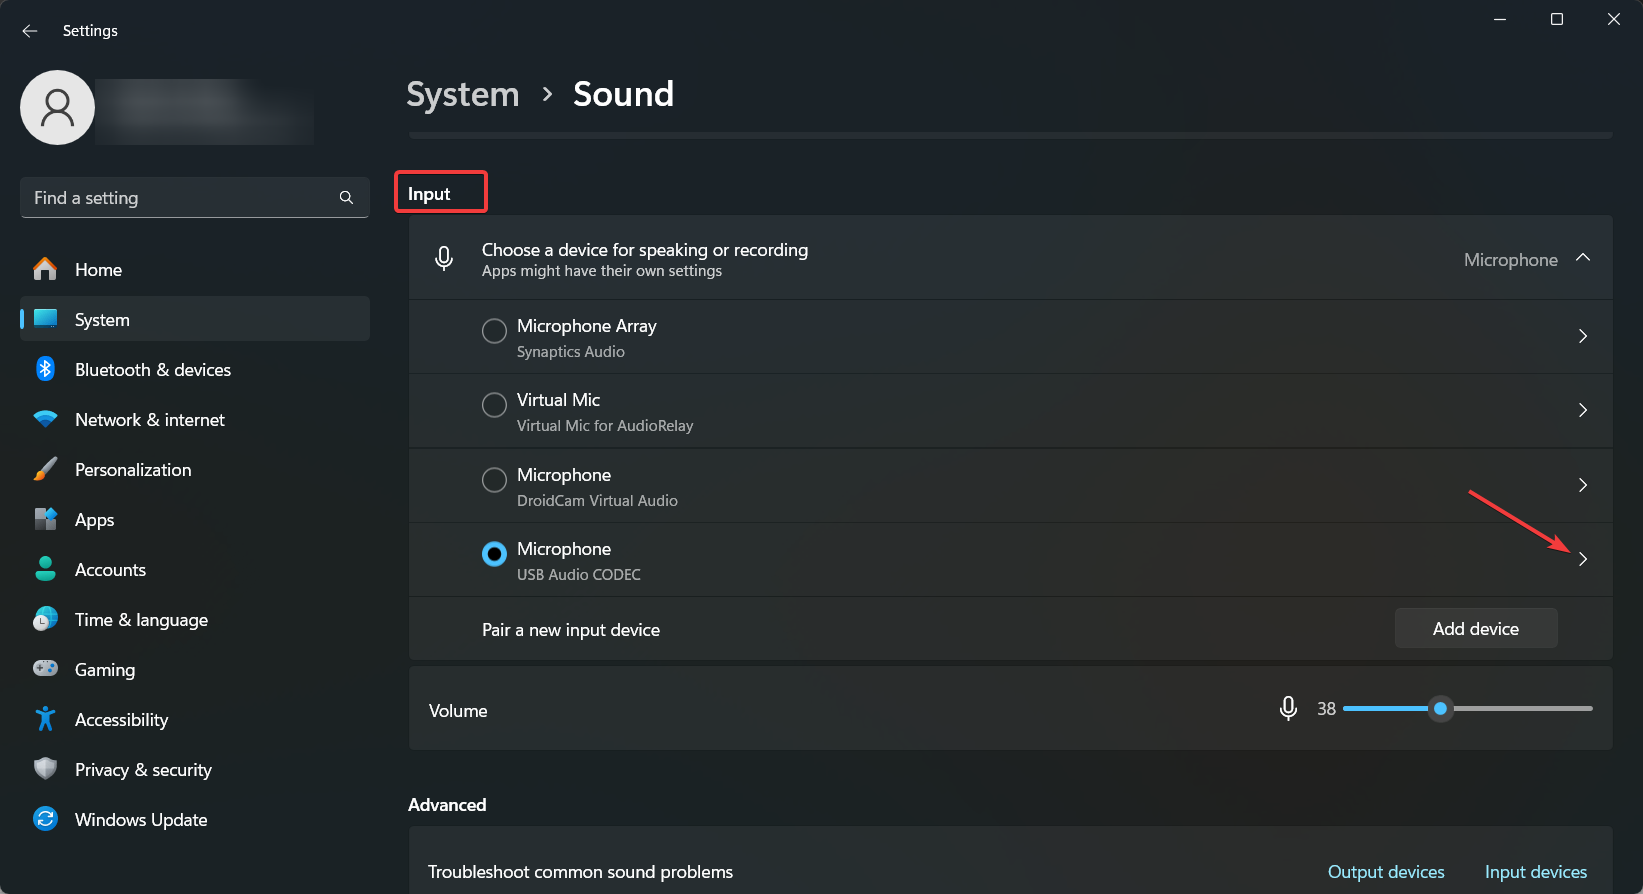
- Now, right-click on the Volume button from the taskbar and select Sound settings.
- Here, go to the Input section, locate your mic and click on the arrow to its right to reach the settings.
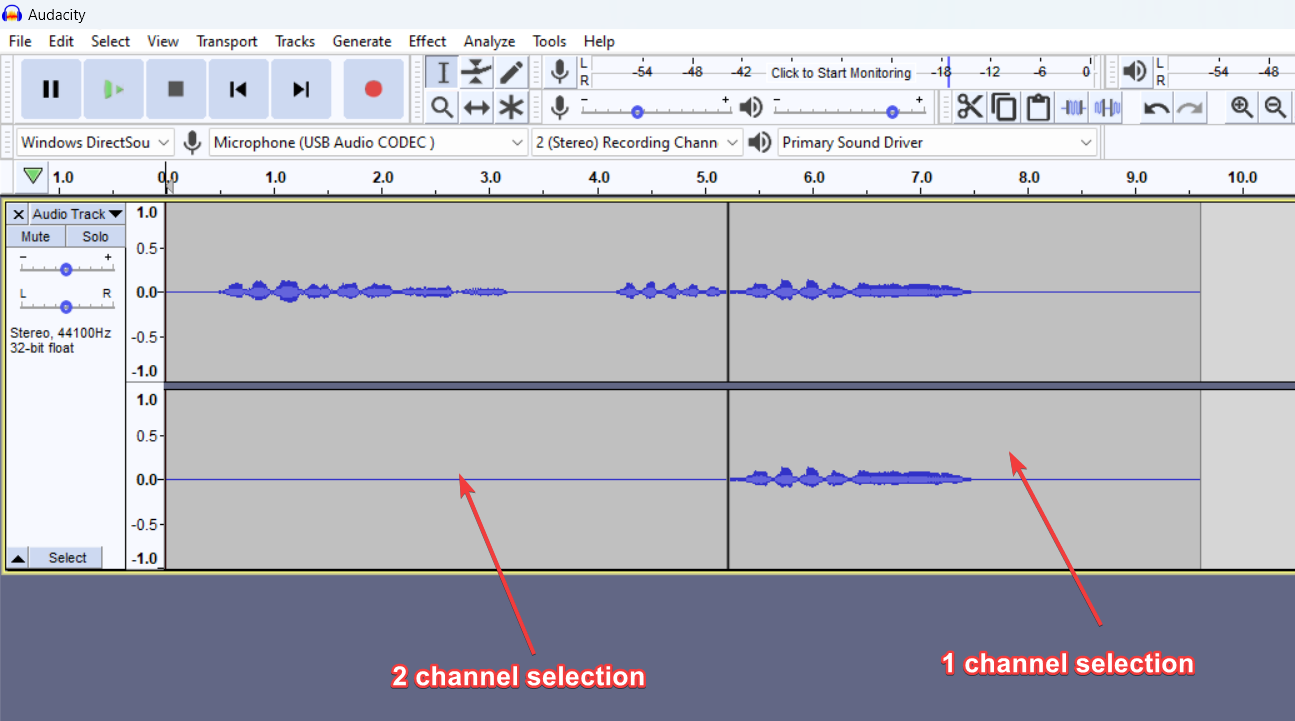
- In this menu, change the input format to 1 channel 44100 Hz. The microphone is recording on one channel. If you select 2 channels, in Audacity you will still get signal on only one of them.
You can experiment with the sampling rate according to your audio devices, but 44100 Hz is the standard recording settings for most audio devices.
4. Monitor the input and set the mic volume
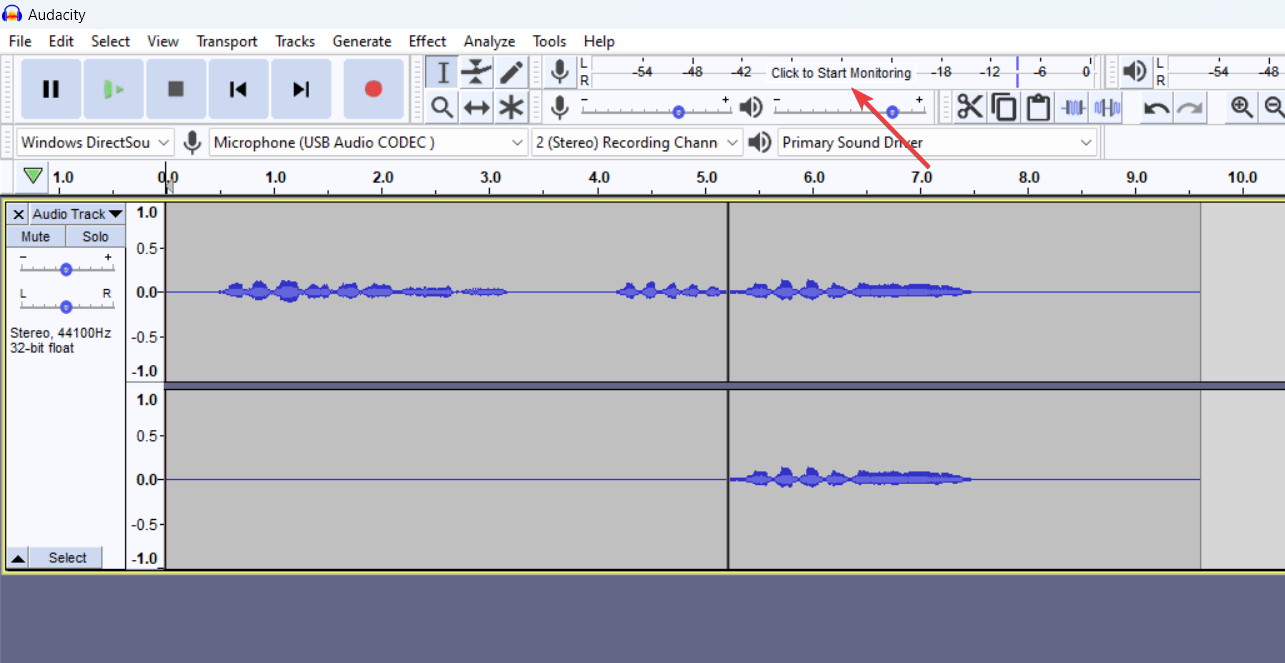
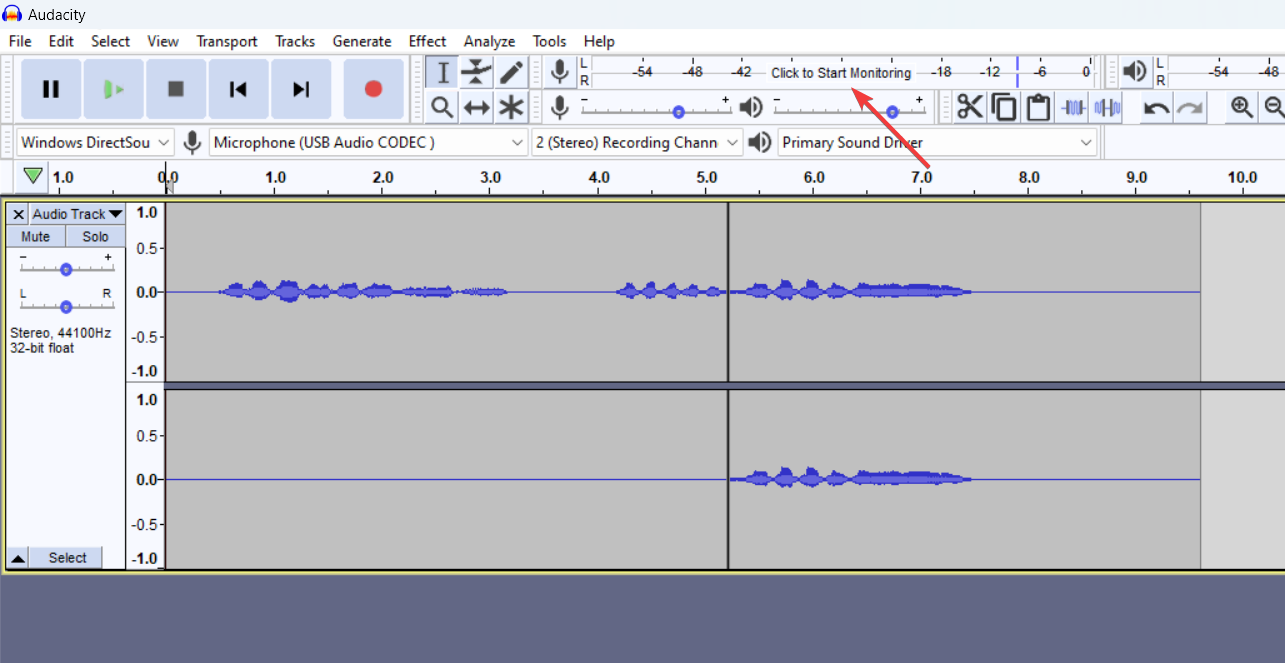
- In Audacity, go to Click to Start Monitoring in the upper part of the window.
- Now, talk or sing as you would do in the recording session and adjust the mic level accordingly.
- Of course, also make sure that the mic is not muted and has plenty of volume from the Windows audio settings, as noted in the first solution.
Audacity may not record sound because the mic volume is too low, so this method will not only tune the volume before recording but also avoid this issue.
5. Allow apps to access your microphone
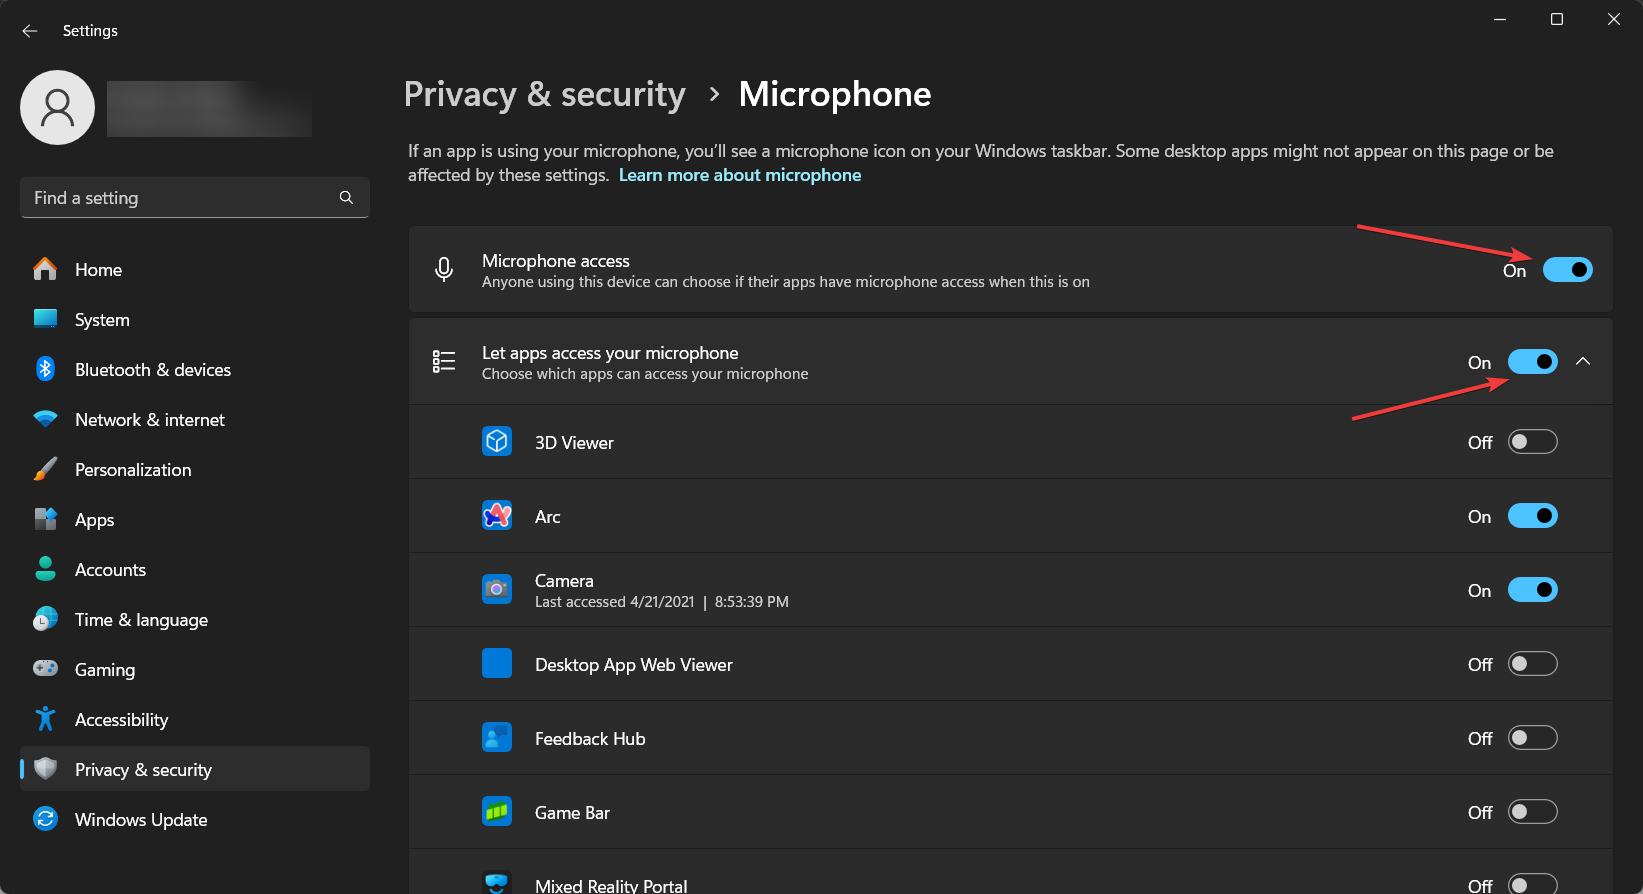
- Under the Start menu, click Settings and then select Privacy & Security.
- Next click Microphone.
- Here, scroll down and click on Microphone.
- Then, make sure the boxes for Microphone Access and Let apps access your microphone are switched on.
- You may also scroll down and make sure that Audacity is allowed to access it. If it does, it will show a Currently in use message under it.
In Windows 11, there is also a menu called Let desktop apps access your microphone. Audacity may be under that section so enable it as well.
6. Update the microphone driver
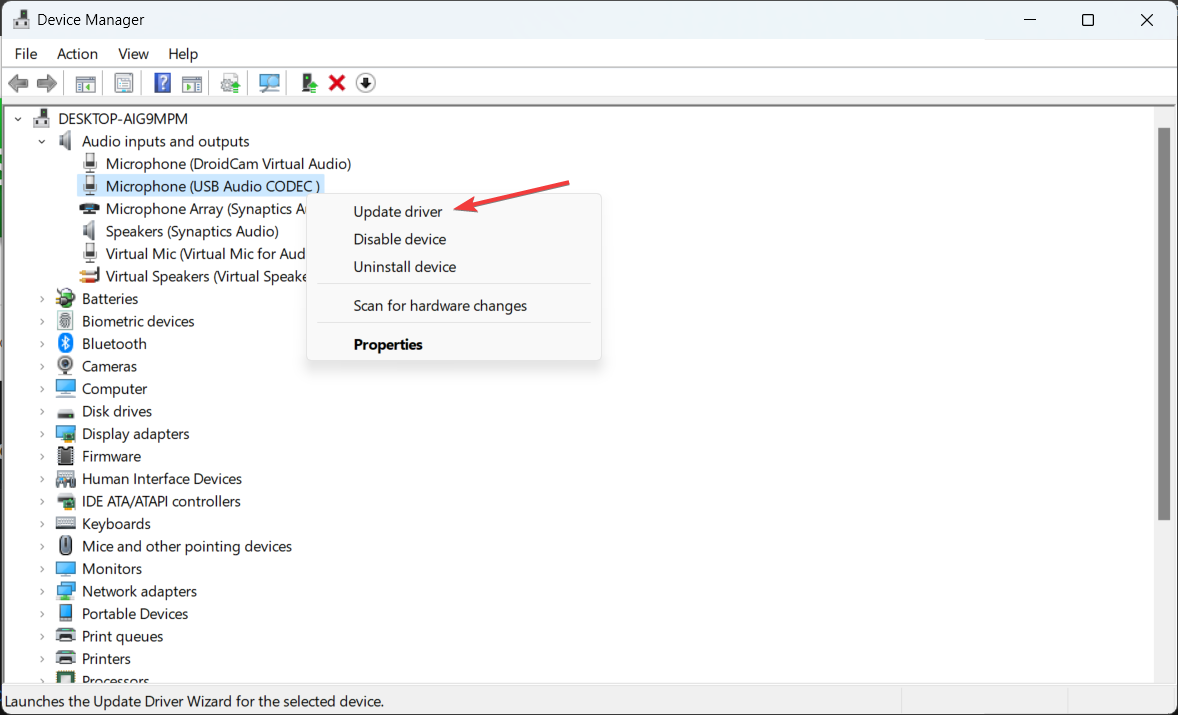
- Right-click the Start button and select Device Manager from the list.
- Go to Audio inputs and outputs and expand the section, right-click on your microphone and select Update driver.
- Select Search automatically for drivers and if there is a new driver, Windows will install it.
This solution is only if your microphone is not delivering any sound in any recording apps.
7. Reinstall Audacity
- Press Win + I to access Settings.
- Go to Apps > Installed apps, find Audacity, click on the dots to its right and select Uninstall.
- Now, open a browser and access the official Audacity download page for Windows.
- Get the installer and run it to perform a fresh installation of Audacity.
As a last resort, you may reinstall Audacity. This way, you will be sure to have the latest version with all the default settings in place, avoiding the Audacity not recording sound issue.
That’s it! To sum our guide up, this problem might be caused by some simple settings in Audacity and/or Windows. if Audacity is not recording the sound, the solutions above should have helped you fix the problem. Our guide on how to download and use Audacity will also offer a lot of extra information.
If Audacity refuses to work, you can look at our list of the best vocal recording software for Windows and get a better tool.
For any other questions or suggestions, feel free to use the comments section below.

